Downloading your messages from iCloud isn't just about nostalgia; it's about preserving critical information, creating secure backups, freeing up valuable iCloud storage, or seamlessly migrating your communication history when you upgrade to a new iPhone or Mac.
In this comprehensive guide, we'll walk you through the most effective methods to download your messages from iCloud, covering various devices and scenarios. We'll also address common limitations, offer smart alternatives, and provide troubleshooting tips to ensure your message history is always within reach.
Part 1. How to Download Messages from iCloud: 4 Proven Methods
Now that you understand the "why" and a few common iCloud quirks, let's dive into the practical "how." We've outlined four effective methods to get your messages downloaded from iCloud, each suited for different needs and devices.
Method 1. Directly from iCloud to Your iPhone
This is the most straightforward method for most users, leveraging Apple's built-in "Messages in iCloud" feature. It's about syncing your entire message history across your devices, rather than a traditional "download" of individual files.
Requirements:
A stable Wi-Fi connection.
Sufficient storage space on your iPhone or iPad for your message history.
All your devices are signed into the same Apple ID.
Messages in iCloud must be enabled.
Steps:
Step 1. On your iPhone or iPad, open Settings.
Step 2. Tap on your Apple ID banner at the very top (your name and profile picture).
Step 3. Tap iCloud.
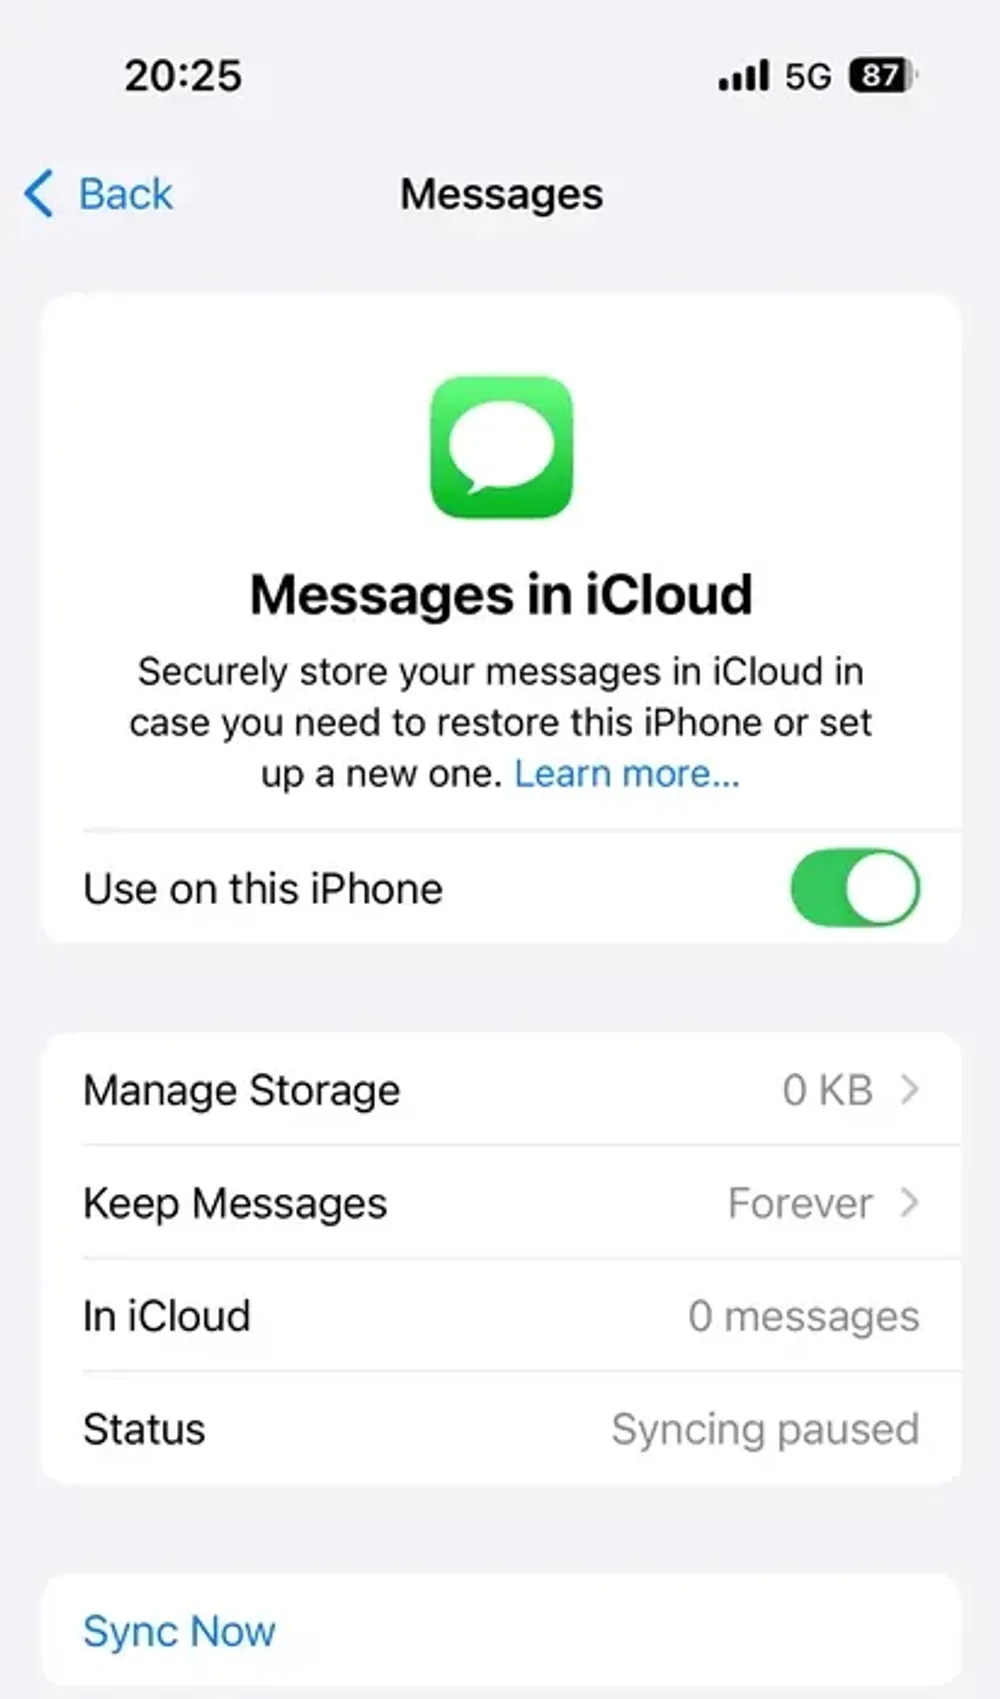
Step 4. Scroll down and tap Messages (ensure the toggle is green, indicating it's turned on). If it's already on, toggle it off and then back on again.
Step 5. Your device will start downloading and syncing your messages from iCloud. The time this takes depends on the size of your message history and your internet speed. You might see a "Downloading Messages from iCloud" status at the bottom of your Messages app.
Limitations:
This is a sync process, not a selective download. You can't pick and choose which conversations to download; it's all or nothing.
Requires sufficient device storage. If your iPhone is nearly full, messages may not finish downloading.
The process can sometimes get stuck, particularly with large message histories or unstable internet connections (we'll cover troubleshooting later!).
It doesn't create a local, independent file that you can move or open outside the Messages app.
Method 2. Using iCloud Backup (Restoring to a New Device)
This method involves restoring your entire device from an iCloud backup that contains your messages. It's usually done when setting up a new iPhone or performing a factory reset and restoring your data.
Requirements:
An iCloud backup that contains the messages you want to restore.
A stable Wi-Fi connection.
Your iPhone or iPad needs to be erased to its factory settings or be a brand-new device.
Steps:
Step 1. Check for an iCloud Backup
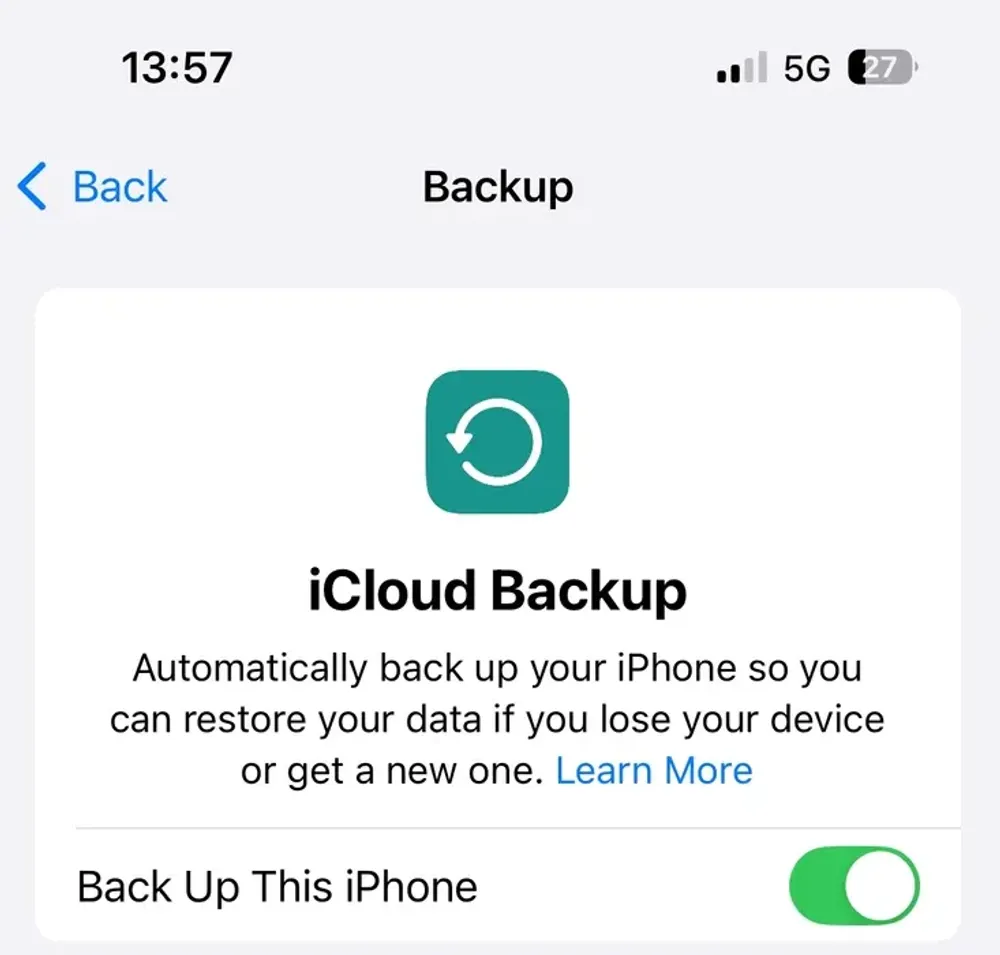
Go to Settings > [Your Name] > iCloud > iCloud Backup. See if "Last Backup" date predates when you might have deleted messages or if it's the backup you want to restore from.
Step 2. Erase Your Device:
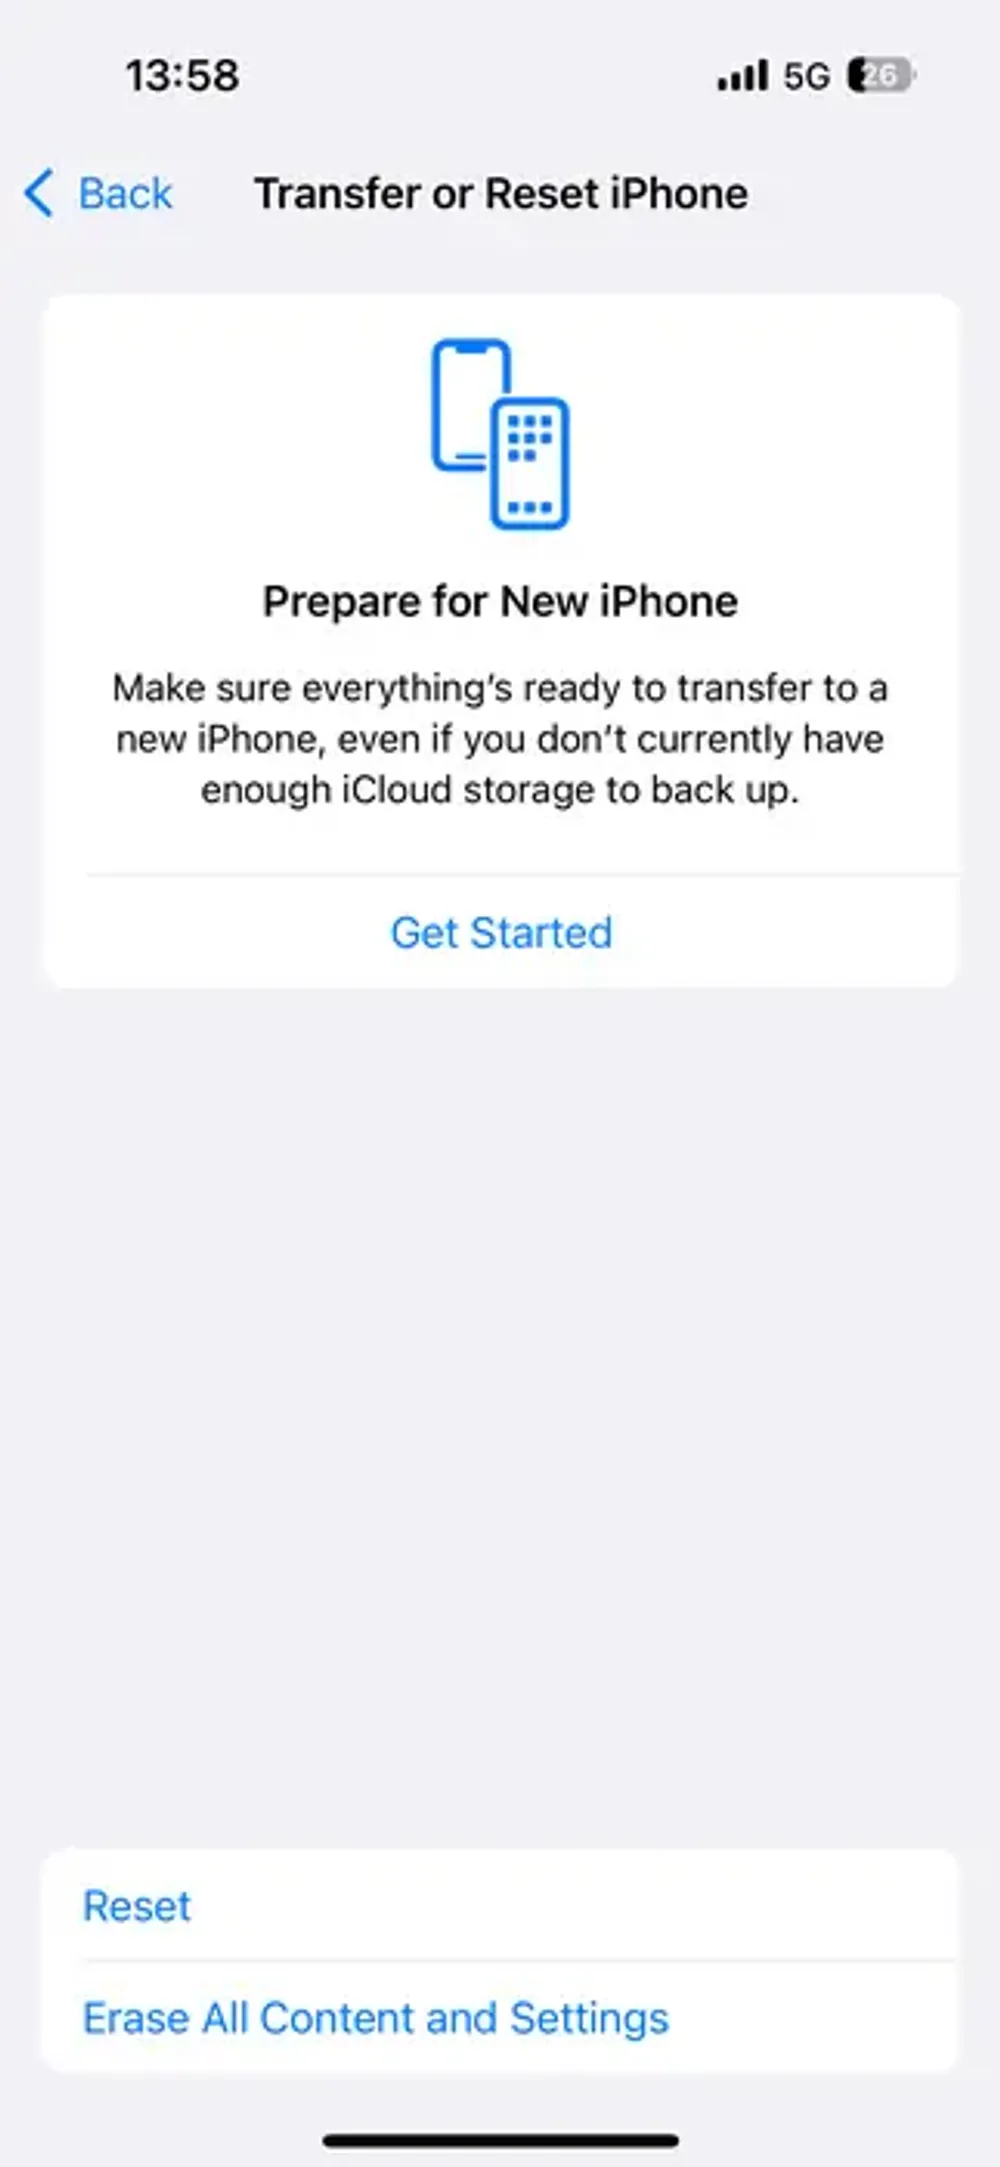
Go to Settings > General > Transfer or Reset iPhone.
Tap Erase All Content and Settings. (Be absolutely sure you want to do this, as it will wipe all current data on your device!)
Confirm the erasure. Your iPhone will restart.
Step 3. Set Up Your iPhone
Follow the on-screen setup prompts (language, region, Wi-Fi, etc.).
Step 4. When you reach the "Apps & Data" screen, select "Restore from iCloud Backup."
Step 5. Sign in with your Apple ID.
Step 6. Select the iCloud backup you wish to restore from. Ensure it's the one that contains your desired messages (check the date and size).
Step 7. Your device will begin restoring. This can take a significant amount of time depending on the backup size and your internet speed. Your messages will reappear in the Messages app as the restore progresses.
Limitations:
This method requires you to erase your current device data, which can be inconvenient if you don't want to lose what's currently on your phone.
It's an all-or-nothing restore. You cannot selectively restore just your messages from an iCloud backup; you must restore the entire backup.
The backup must have been created before the messages you want to recover were deleted.
Can be time-consuming and uses a lot of data.
Method 3. From iCloud to Your Mac
If you have a Mac, you can sync your iMessages directly to it, making them accessible on your desktop. This is similar to the iPhone syncing method.
Requirements:
A Mac running a recent version of macOS.
Your Mac must be signed into the same Apple ID as your iPhone/iPad.
Messages in iCloud must be enabled on both your iPhone/iPad and your Mac.
A stable internet connection.
Steps:
Step 1. On your Mac, open the Messages app.
Step 2. In the top menu bar, click Messages > Settings (or Messages > Preferences on older macOS versions).
Step 3. Click on the iMessage tab.
Step 4. Ensure the box next to "Enable Messages in iCloud" is checked.
Step 5. Click "Sync Now" if you want to force a sync immediately (though it usually syncs automatically).
Step 6. Your messages will begin appearing in the Messages app on your Mac.
Saving Attachments from Mac: Once messages are on your Mac, you can manually save attachments (photos, videos, documents) from individual conversations by right-clicking (or Control-clicking) on them and choosing "Save." For entire conversations, you might need to copy and paste text or use a third-party print-to-PDF utility.
Limitations:
Again, this is a sync, not a direct download of individual files or folders of messages.
Saving entire conversations as text files or PDFs isn't a built-in feature; you'll typically have to manually copy/paste or use print options.
Only works for messages that are synced via Messages in iCloud, not necessarily those found only within an iCloud backup.
Method 4. From iCloud to a PC (Using Third-Party Tools)
For Windows PC users who want to download messages from iCloud, or for those who need more control like selective recovery or accessing messages from an iCloud backup without resetting their iPhone, third-party data recovery tools are often the solution. These tools can typically scan your iCloud backup files or directly extract data, including messages, to your computer.
Among various third-party tools available, Gbyte Recovery is frequently cited for its user-friendliness and comprehensive features when it comes to recovering and downloading data from iOS devices and iCloud backups.
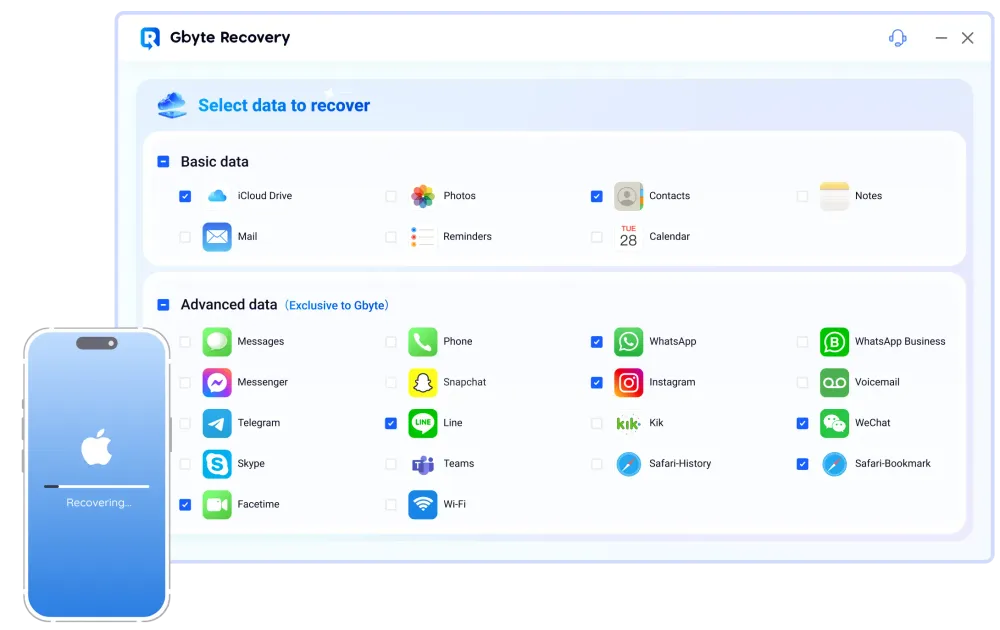
Key Features Often Highlighted:
Multiple Recovery Modes: Can often recover from iOS devices directly, iTunes backups, and iCloud backups.
Selective Data Recovery: Allows you to preview and select specific message threads, contacts, photos, etc., to recover.
User-Friendly Interface: Designed to be intuitive, guiding you through the recovery process.
Wide Data Type Support: Beyond messages, often supports photos, videos, contacts, call history, WhatsApp, etc.
Preview Functionality: Lets you see recoverable messages before committing to a download.
How to Connect:
Step 1. Get the Gbyte Recovery software from its official website and install it on your PC.
Step 2. Choose the data type you want to recover
Step 3. Enter your Apple ID and password to access your iCloud backups.
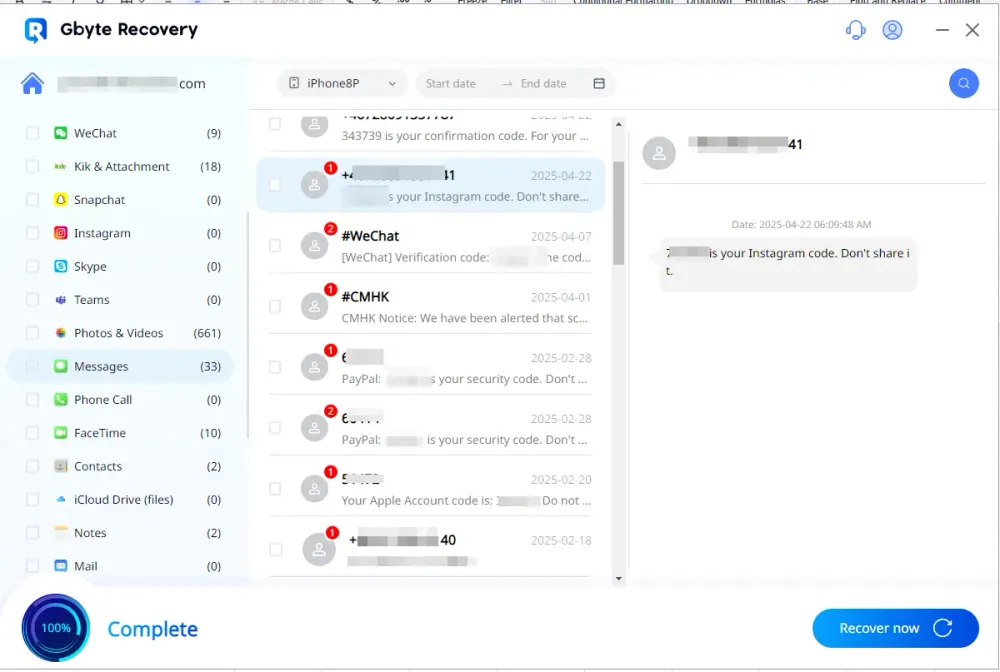
Step 5. The software will scan the downloaded backup. Once done, you can usually preview message threads.
Step 6. Choose the messages you want to download and initiate the recovery process to save them to your PC.
Supported Data (for message recovery specific to these tools):
iMessages
Text messages (SMS/MMS)
Message attachments (photos, videos, audio files)
Limitations of Third-Party Tools:
Cost: Most reputable tools are paid software.
Security Concerns: Always ensure you download software from a reputable source to avoid malware. Be cautious about entering your iCloud credentials into unknown software.
Reliability: Effectiveness can vary. While powerful, no tool guarantees 100% recovery in all scenarios, especially if data is overwritten.
Installation Required: You need to download and install software on your computer.
Part 2. Comparison Table: Which Method to Choose for Downloading Messages from iCloud?
Choosing the right method depends entirely on your specific situation, the device you're using, and your comfort level with technical steps. Here's a comparison to help you decide:
Feature/Method | Method 1: iPhone Sync (Messages in iCloud) | Method 2: iCloud Backup Restore | Method 3: Mac Sync (Messages app) | Method 4: PC (Third-Party Tools) |
Ease of Use | Very Easy | Moderate (requires erase) | Easy | Moderate (software installation) |
Cost | Free (uses iCloud storage) | Free (uses iCloud storage) | Free (uses iCloud storage) | Usually Paid (software purchase) |
Data Loss Risk | Low (syncs existing data) | High (erases current device) | Low (syncs existing data) | Low (reads from backup/device) |
Selectivity | None (all or nothing sync) | None (all or nothing restore) | None (all or nothing sync) | High (can select specific messages) |
Device Needed | iPhone/iPad | iPhone/iPad | Mac | Windows PC |
Purpose | Keep messages synced across devices | Restore entire device to past state | View/archive on Mac | Selective download, PC backup, deleted recovery |
Requires Device Reset? | No | Yes | No | No (usually) |
Access on PC? | No (indirectly via Mac then file transfer) | No (indirectly via Mac then file transfer) | No (unless transferred from Mac) | Yes, direct to PC |
Best For | Everyday syncing, new iPhone setup (simple) | Full data recovery to new/wiped device | Archiving on Mac, general viewing | Selective recovery, PC backup, deleted messages |
Which Method Should You Choose?
For Everyday Syncing & New iPhone Setup (Simple): Go with Method 1 (Directly from iCloud to Your iPhone/iPad). It's built for seamless integration.
For Comprehensive Data Recovery to a New or Erased Device: Method 2 (Using iCloud Backup Restore) is your best bet if you need to revert your entire phone to a previous state where your messages existed. Just be prepared to erase your device.
For Viewing & Archiving Messages on Your Desktop (Apple Ecosystem): Method 3 (From iCloud to Your Mac) is perfect for extending your message access to your Mac. You can also manually save attachments.
For Selective Message Download, PC Backup, or Recovering Deleted Messages Without Resetting: Method 4 (From iCloud to a PC using Third-Party Tools) is likely your only and best option. This method provides the most control and flexibility, especially for non-Apple users or specific recovery needs.
Part 3. Alternative Options: Other Ways to Save Your iMessages
While the above methods focus on directly "downloading" from iCloud, there are other ways to save or archive your iMessages that don't directly involve iCloud sync or backup, especially if you just need to save a few key conversations or attachments.
Screenshots: The simplest method. Just take screenshots of the conversation on your iPhone/iPad.
Pros: Quick, easy, no extra tools.
Cons: Not searchable, large conversations require many screenshots, not ideal for attachments.
Email/Copy & Paste:
Email: You can select a conversation, tap and hold a message, choose "More...", select multiple messages, and then tap the share icon to email the conversation to yourself.
Copy & Paste: Simply copy message text and paste it into a notes app, document, or email.
Pros: Free, accessible on any device with email.
Cons: Manual, tedious for long conversations, attachments might not transfer easily.
Third-Party iOS Management Software (Non-Recovery Type): Some general iOS management tools (different from data recovery tools) allow you to browse and export message data from your iTunes backups or directly from your device to a computer. These are often used for managing device content.
Pros: Can export in readable formats (HTML, PDF), more organized than copy/paste.
Cons: Usually paid, requires connecting your iPhone to a computer.
Part 4. Troubleshooting: What to Do If Your Messages Aren’t Downloading
It's a common and frustrating scenario: you've followed the steps, but your messages just aren't appearing or the "Downloading Messages from iCloud" status seems stuck forever. Don't worry, many of these issues have straightforward fixes.
Here's a troubleshooting guide for when your messages aren't downloading from iCloud:
Check Your Internet Connection:
Verify Wi-Fi: Ensure you're connected to a strong, stable Wi-Fi network. Messages won't download over cellular data, especially large histories.
Test Connection: Try opening a few websites or streaming a video to confirm your internet is working properly.
Restart Router: Sometimes, a simple router restart can resolve connectivity issues.
Verify Apple System Status:
Occasionally, the issue isn't on your end but with Apple's servers.
Visit Apple's System Status page (https://www.google.com/search?q=status.apple.com) to check if there are any reported outages or issues with iCloud, iMessage, or other related services. If there's an outage, you'll just have to wait for Apple to resolve it.
Ensure Consistent Apple ID Across Devices:
Messages in iCloud works by syncing across devices signed into the same Apple ID.
On your iPhone/iPad: Go to Settings > [Your Name].
On your Mac: Open Messages app > Settings (or Preferences) > iMessage.
Confirm the Apple ID displayed is identical on all devices where you expect messages to sync.
Check Your Device Storage:
Even though messages are in iCloud, your device needs local space to download and store them.
Go to Settings > General > iPhone Storage. If your device is critically low on space, it might prevent new data from downloading. Delete unnecessary apps, photos, or videos to free up space.
Toggle Messages in iCloud Off and On:
This can often kickstart the syncing process.
On iPhone/iPad: Go to Settings > [Your Name] > iCloud > Messages. Toggle the switch OFF, wait about 30 seconds, and then toggle it back ON. You might be prompted about local copies – usually, you'll want to choose to keep messages on your device.
On Mac: Open Messages app > Settings (or Preferences) > iMessage. Uncheck "Enable Messages in iCloud," wait, then re-check it.
Restart Your Device:
A simple restart can often clear minor software glitches that might be preventing the sync. Turn your iPhone/iPad or Mac completely off and then back on.
Sign Out of Apple ID and Sign Back In:
This is a more drastic step but can resolve deeper authentication issues.
Warning: Signing out of your Apple ID will remove all iCloud data (like photos, documents, etc.) from your device. Make sure you have backups or that this data is synced elsewhere before proceeding.
On iPhone/iPad: Go to Settings > [Your Name] > Sign Out. Follow the prompts. Restart your device, then sign back in.
On Mac: Go to System Settings/Preferences > Apple ID > Overview > Sign Out. Restart, then sign back in.
Update Your Software:
Ensure your iPhone/iPad (iOS) and Mac (macOS) are running the latest available software versions. Bugs in older versions can sometimes interfere with iCloud services.
On iPhone/iPad: Settings > General > Software Update.
On Mac: System Settings/Preferences > General > Software Update.
If you've tried all these steps and are still facing issues, it might be time to contact Apple Support for more personalized assistance.
Part 5. Conclusion
We've explored several proven methods, from the native syncing capabilities on your iPhone and Mac to the comprehensive restoration options via iCloud backups, and even powerful third-party tools for selective downloads to a PC. By understanding the "how" and "when" for each, you're now equipped to choose the best approach for your specific needs.
Remember to consider your device, your need for selectivity, and whether you're comfortable with a device reset. And if you ever hit a snag, our troubleshooting tips are there to help you get back on track.
Your conversations are valuable, and with this guide, you have the knowledge to keep them safe and accessible, whenever and wherever you need them.
Part 6. FAQs
Q1: How can I download all my messages from iCloud to my iPhone or Mac?
To an iPhone or iPad: The primary method is to use Messages in iCloud. Go to Settings > [Your Name] > iCloud and toggle Messages on. This will sync your entire message history to your device. Keep your device connected to a stable Wi-Fi network and a power source. For a brand-new or erased device, you can restore a full iCloud backup during the initial setup process, which will download messages along with all other data from the backup.
To a Mac: Open the Messages app on your Mac, go to Settings (or Preferences) > iMessage, and check the box for "Enable Messages in iCloud." Make sure your Mac is signed in with the same Apple ID as your iPhone. The messages will then sync and appear in the app. You can manually save attachments like photos and videos from conversations.
Q2: How long does it take to download messages from iCloud, and can I make it faster?
The time it takes varies widely, from a few minutes to several hours, or even days, for a large message history. The main factors are:
Size of your message history: The more messages and attachments (photos, videos) you have, the longer it will take.
Internet speed: A slow or unstable Wi-Fi connection is the most common cause of delays.
Device storage: Your device needs enough local storage to download and save all the messages.
To make it faster, you can:
Connect to the fastest, most stable Wi-Fi network available.
Free up storage on your device if it is nearly full.
Stop other data-intensive activities (like streaming or large downloads) on the same network to prioritize the message download.
Q3: Can I download old or deleted messages from iCloud?
Yes, but it depends on the circumstances:
Old Messages (not deleted): If you have Messages in iCloud enabled, your entire history is in the cloud. Simply enabling the feature on a new device will download all your old conversations.
Deleted Messages:
"Recently Deleted" Folder: On iOS 16 and later, you can recover messages you deleted within the last 30-40 days by going to Filters > Recently Deleted in the Messages app.
iCloud Backup: If you deleted messages but then created an iCloud backup before the deletion, you can restore your entire device from that backup. Warning: This will erase all current data on your phone and replace it with the data from the backup, so you will lose anything new added since the backup was created.
Q4: How can I download my iCloud messages to a Windows PC or computer?
Apple does not provide a native app or a way to view messages on iCloud.com from a Windows PC. To download messages to a PC, you will need to use a third-party data recovery or iOS management tool. These applications can:
Access your iCloud backup files on your PC.
Scan the backup to find your messages.
Allow you to preview and selectively save messages and attachments to your computer in a readable format (like HTML or PDF).
Q5: Why are my messages stuck on "Downloading from iCloud," and what can I do to fix it?
This is a very common issue, and it's usually a sync problem. Here are a few troubleshooting steps to resolve it:
Check your internet connection and ensure it is stable.
Verify Apple's System Status online to see if there are any service outages.
Toggle Messages in iCloud off and on in your iCloud settings to restart the sync process.
Restart your device (iPhone, iPad, or Mac).
Check your device storage. If your device is full, it cannot download the messages.
Update your device's software to the latest iOS or macOS version.
As a last resort, sign out of your Apple ID and sign back in, but be aware that this will remove all iCloud data from your device and require it to be synced again.
